
Table of Contents
- Benefits of Brewing Kombucha at Home
- Essential Components of a Kombucha Making Kit
- Step-by-Step Guide to Perfecting Your Brew
- Flavoring Your Kombucha with Creative Ingredients
- Common Mistakes to Avoid When Making Kombucha
- Q&A
- Concluding Remarks
Benefits of Brewing Kombucha at Home
Brewing kombucha at home allows you to embrace creativity in your kitchen while indulging in a healthy beverage that’s packed with probiotics. With a kombucha making kit, the process becomes not just straightforward but also enjoyable. You can experiment with various flavor combinations, from classic ginger to exotic fruits like lychee and passionfruit, ensuring each batch is uniquely yours. Moreover, home brewing means you’re in control of the ingredients, enabling you to avoid unwanted preservatives and sugar added to store-bought varieties.
Another significant advantage of making kombucha at home is the cost-effectiveness. Buying ready-made kombucha can add up quickly, especially if you enjoy it regularly. By investing in a kombucha making kit, you can produce large quantities at a fraction of the price. Over time, the savings can be substantial, freeing up your budget for other healthy snacks or beverages. Plus, brewing your own kombucha reduces waste since you can reuse bottles and avoid the packaging that comes with commercial products.
Additionally, home-brewed kombucha can contribute to a greater understanding of fermentation and its health benefits. Engaging with the fermentation process allows you to learn about beneficial bacteria and yeast, enhancing your appreciation of gut health. As you become more experienced, you can start sharing your knowledge with friends or even teach kombucha brewing classes, turning your passion into a community-building opportunity. Embracing this hobby not only supports your health but also fosters a deeper connection with food and drink.
Essential Components of a Kombucha Making Kit
When embarking on your kombucha brewing journey, having the right kit is essential for achieving the perfect brew. A comprehensive kombucha making kit typically includes a range of high-quality components that work together to create the ideal environment for fermentation. At the heart of these kits is the SCOBY, or Symbiotic Culture of Bacteria and Yeast, without which your kombucha journey simply cannot begin. This unique culture is responsible for the fermentation process, converting sweet tea into the tangy, effervescent beverage we love.
Another crucial element found in these kits is a fermentation vessel. This is where the magic happens! Generally made of glass or food-grade plastic, the vessel should be large enough—usually at least one gallon—to allow room for fermentation and secondary flavoring. Many kits also include mash filtering bags for easily brewing large batches of tea while making cleanup a breeze. Tools like a pH tester are also valuable, as they allow you to monitor the acidity level of your kombucha, ensuring the perfect balance of taste and health benefits.
Lastly, a good kombucha kit will often come with various flavoring components to experiment with your brew. Common additions include dried fruits, herbs, and spices. A simple table can help break down some popular flavoring options:
| Flavoring Option | Complementary Notes |
|---|---|
| Ginger | Spicy and refreshing |
| Lemon | Citrusy and bright |
| Berries | Sweet and tart |
| Mint | Crisp and aromatic |
With these key components in your kit, you can unlock endless opportunities to create delicious and refreshing homemade kombucha. Your journey into fermentation not only becomes easier with the right tools but also opens the door to a world of flavorful exploration.

Step-by-Step Guide to Perfecting Your Brew
Crafting the perfect brew begins with gathering the essentials from your kombucha making kit. Start by ensuring you have all the components: a SCOBY (symbiotic culture of bacteria and yeast), tea blend (black or green tea is ideal), sugar, and starter tea. Remember, the quality of your ingredients plays a crucial role in the final flavor of your kombucha. In addition, have your brewing vessel ready—glass is preferred for its non-reactive properties.
Next, prepare your tea base by boiling water and steeping your chosen tea blend. Add the required amount of sugar, stirring until it dissolves completely. Once the tea is at room temperature, pour it into your fermentation vessel and then add the starter tea. This is where the magic happens: introduce your SCOBY to the mix. Make sure to handle it gently and with clean hands to avoid contamination.
Place a breathable cover, like a coffee filter or cloth, over the top of the fermentation vessel and secure it with a rubber band. Store the vessel in a warm, dark place for about one to two weeks, depending on your taste preference. During this fermentation period, flavor and fizz develop as the microbes feast on the sugar in the tea. Regularly check on your brew, and when it reaches your desired flavor profile, it’s time to bottle it! For a fizzy touch, consider adding flavorings like ginger, fruits, or herbs before sealing your bottles. Enjoy the process and embrace the creativity involved in making your own kombucha!
Flavoring Your Kombucha with Creative Ingredients
Elevating your brew beyond the classic taste of kombucha is an adventurous journey waiting to happen. By experimenting with an array of ingredients, you can tailor your kombucha to match your personal palate and make each batch a unique masterpiece. Consider incorporating fruits such as mango, raspberry, or kiwi. These fruits not only add sweetness but also a vibrant color, enhancing the visual appeal of your drink. Try infusing your kombucha with herbs like rosemary or mint for a refreshing twist that invigorates your senses with each sip.
Spices can also offer a delightful depth of flavor, transforming your brew into a warming elixir. A touch of ginger introduces a zesty kick, while cinnamon can lend a cozy aroma perfect for seasonal enjoyment. Alternatively, a hint of lavender can provide an aromatic relaxation experience, subtly calming and grounding. When experimenting, remember to start with small amounts and gradually adjust according to your taste preferences to ensure the balance of flavors stays harmonious.
Incorporating superfoods can elevate your kombucha not just in flavor but also in health benefits. Consider adding ingredients such as spirulina, acai powder, or matcha for a nutrient boost. These additions can be as simple as a teaspoon or two, incorporated during the second fermentation process, allowing the flavors to meld beautifully. To keep track of your experiments, you might find it helpful to create a flavor journal, documenting each batch’s ingredients, the taste, and any adjustments for future brews. Below is a handy table to track your favorite flavor combinations:
| Flavoring Ingredient | Effect on Flavor | Suggested Pairings |
|---|---|---|
| Mango | Sweet and tropical | Pineapple, Coconut |
| Ginger | Zesty and warming | Lemon, Mint |
| Cinnamon | Cozy and aromatic | Apple, Clove |
| Spirulina | Earthy and nutty | Lemon, Ginger |

Common Mistakes to Avoid When Making Kombucha
When diving into the world of kombucha brewing, it’s easy to trip over common pitfalls that may compromise your brew. One major misstep is neglecting proper hygiene. Kombucha is, after all, a fermented drink that relies heavily on the delicate balance of bacteria and yeast. To ensure a successful fermentation process, always start with sanitized equipment. This includes your jars, utensils, and any surfaces that come into contact with your ingredients. Avoid using plastic, as it can harbor bacteria; instead, opt for glass or food-grade stainless steel.
Another frequent mistake is not allowing your kombucha to ferment long enough. Each batch is unique, and factors like temperature, the strength of your SCOBY, and even the type of tea you use can affect fermentation time. Monitor the taste during the brewing period to find the perfect balance of sweetness and acidity that appeals to you. Rushing the process can yield a drink that is too sweet or overly tangy, detracting from the desired flavor. A good rule of thumb is to taste your kombucha every few days, aiming for a ferment time between 7 to 21 days.
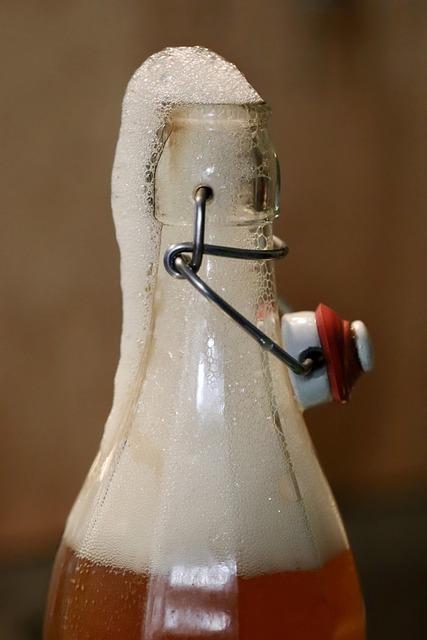
don’t overlook the bottling stage; it’s a crucial step that can lead to unwanted outcomes if not executed carefully. When transferring your kombucha to bottles, make sure to leave some space at the top to allow for carbonation. Overfilling can result in messy explosions due to pressure buildup. Additionally, using high-quality, airtight bottles will prevent leaks and potentiation of off-flavors. Remember to add flavorings such as fruits or herbs sparingly, as too much can overwhelm the natural taste of the kombucha and create an imbalanced brew.
Q&A
Q&A: Understanding Kombucha Making Kits
Q1: What is a kombucha making kit?
Q2: Do I need any special equipment to use a kombucha making kit?
Q3: How long does it take to make kombucha with a kit?
Q4: Is it difficult to make kombucha at home?
Q5: What flavors can I create using a kombucha making kit?
Q6: Can I use my own tea or sugar in the kombucha making process?
Q7: How do I store my kombucha once it’s brewed?
Q8: Is kombucha making safe for everyone?
Q9: Where can I find a quality kombucha making kit?
Q10: What are the benefits of making kombucha at home?
Concluding Remarks